
0. 웹소켓의 특징, 한계
1. Socket.io?
2. Lifecycle hooks
3. Postman으로 연결 테스트
웹소켓의 특징
양방향 송수신 가능(Full duplex)
- 데이터 송수신을 동시에 처리할 수 있는 통신방법
- 클라이언트와 서버가 서로 원할 때 데이터를 주고 받을 수 있음
- ws 프로토콜을 사용하면 웹소켓 포트에 접속해 있는 모든 클라이언트에게 이벤트 방식으로 응답함
- 통상적인 http 통신은 단방향 통신임
실시간 네트워킹 가능(Real-time Networking)
- 채팅, 주식, 비디오 등 웹 환경에서 연속된 데이터를 빠르게 노출함
- 여러 단말기에서 빠르게 데이터 교환할 수 있음
웹소켓의 한계
- HTML5에 최적화 된 프로토콜이기 때문에 HTML5 이전의 기술로 구현된 서비스에서는 동작하지 않게 된다.
- 이를 보완하기 위해 nodeJS의 경우 socket.io나 sockJS, 스프링의 경우 STOMP라는 기술을 추가적으로 사용하며, 이를 이용해 해당 브라우저에 맞게 동작할 수 있게 설정할 수 있다.
- NestJS에서는 websocket과 socket.io 모두 지원하고 있으며, socket.io에 대해서 좀 더 자세히 살펴보자.
Socket.io
- socket.io는 node.js 기반으로 실시간 이벤트 서버를 개발할 수 있는 오픈소스 라이브러리이다.
- 멀티 디바이스(web, android, ios, windows)를 지원하며, ws를 지원하지 않는 브라우저도 직관적으로 지원한다.
- websocket server는 client와 서버 간에 http protocol로 커넥션을 초기에 맺고 ws-websocket protocol로 upgrade한 후 서로에게 heartbeat를 주기적으로 발생시켜 커넥션이 유지되고 있는지 체크하며 네트워크를 유지하는 방식이다.
Installation
npm i --save @nestjs/websockets @nestjs/platform-socket.io
npm i --save-dev @types/socket.io
nest-cli를 이용한 Gateway 생성
npx nest g ga channels
아래는 소켓을 이용한 메세지 게이트웨이 구현이다.
channels.gateway.ts
import { Logger } from '@nestjs/common';
import {
	OnGatewayConnection,
	OnGatewayDisconnect,
	OnGatewayInit,
	SubscribeMessage,
	WebSocketGateway,
	WebSocketServer,
} from '@nestjs/websockets';
import { Server } from 'socket.io';

@WebSocketGateway(3000, { namespace: 'channels' })
export class ChannelsGateway
	implements OnGatewayInit, OnGatewayConnection, OnGatewayDisconnect
{
	constructor() {}

	@WebSocketServer() server: Server;
	private logger = new Logger(ChannelsGateway.name);

	afterInit(server: any) {
		throw new Error('Method not implemented.');
	}

	handleConnection(client: any, ...args: any[]) {
		throw new Error('Method not implemented.');
	}

	handleDisconnect(client: any) {
		throw new Error('Method not implemented.');
	}

	@SubscribeMessage('message')
	handleMessage(client: any, payload: any): string {
		return 'Hello world!';
	}
}
Lifecycle hooks
3가지 유용한 수명 주기 후크를 사용할 수 있다. 이들 모두에는 해당 인터페이스가 있으며 다음 표에 설명되어 있다.
| OnGatewayInit | 메서드 를 구현하도록 강제합니다 afterInit(). 라이브러리별 서버 인스턴스를 인수로 사용합니다(필요한 경우 나머지를 분산시킵니다). |
| OnGatewayConnection | 메서드 를 구현하도록 강제합니다 handleConnection(). 라이브러리별 클라이언트 소켓 인스턴스를 인수로 사용합니다. |
| OnGatewayDisconnect | 메서드 를 구현하도록 강제합니다 handleDisconnect(). 라이브러리별 클라이언트 소켓 인스턴스를 인수로 사용합니다. |
afterInit()
afterInit(server: any) {
		throw new Error('Method not implemented.');
	}
웹소켓 서버가 실행되면 afterInit 함수가 실행된다. server 변수를 사용하면 서버에 연결된 클라이언트들에게 이벤트를 발생시킬 수 있다.
handleConnection(), handleDisconnect()
handleDisconnect(client: Socket) {
   this.logger.log(`Client Disconnected : ${client.id}`);
}

handleConnection(client: Socket, ...args: any[]) {
   this.logger.log(`Client Connected : ${client.id}`);
}
클라이언트의 connect/disconnect 이벤트는 각각 handleConnection과 handleDisconnect에서 처리한다.
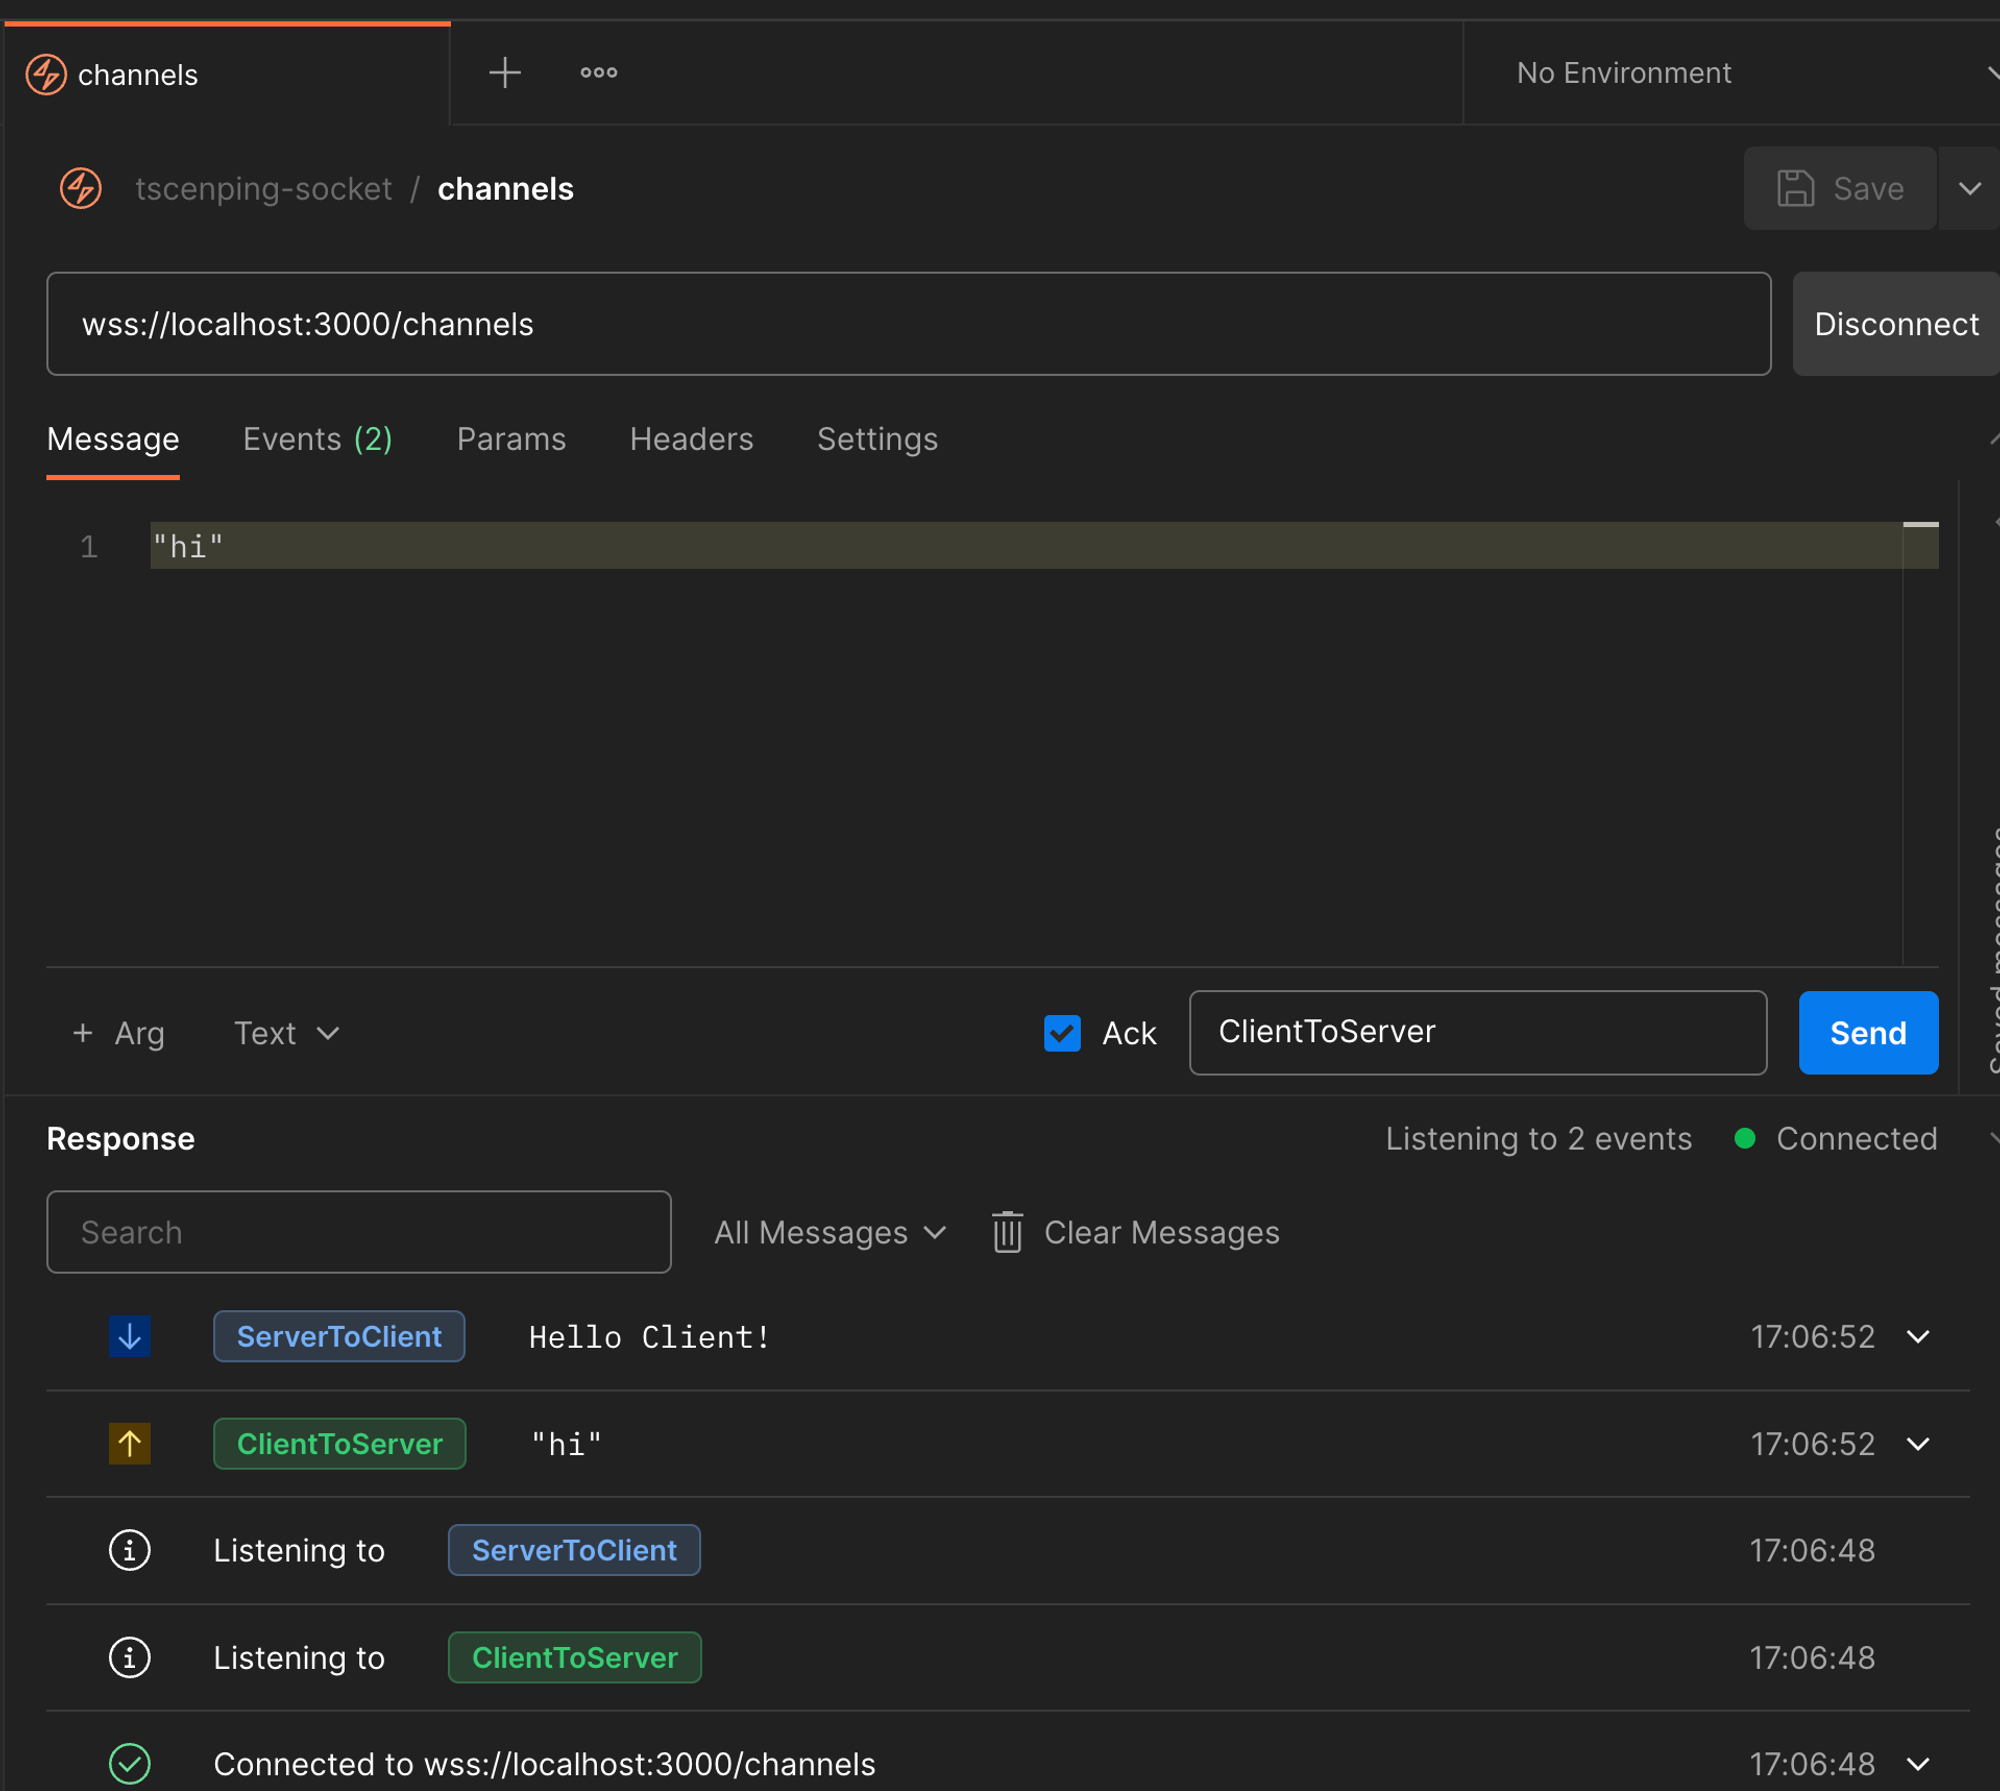
기본적인 설정은 완료되었고 Postman 에서 아래와 같이 소켓 연결 테스트를 할 수 있다.
Postman으로 연결 테스트
@SubscribeMessage('ClientToServer')
	handleMessage(@MessageBody() data: string) {
		this.logger.log('ClientToServer: ', data);
		this.server.emit('ServerToClient', 'Hello Client!');
	}

https://docs.nestjs.com/websockets/gateways
Documentation | NestJS - A progressive Node.js framework
Nest is a framework for building efficient, scalable Node.js server-side applications. It uses progressive JavaScript, is built with TypeScript and combines elements of OOP (Object Oriented Programming), FP (Functional Programming), and FRP (Functional Rea
docs.nestjs.com
Part2 에서는 room을 통해 원하는 소켓에다 이벤트를 뿌려줄 지에 대한 내용을 작성할 것이다.
'NestJS' 카테고리의 다른 글
| [NestJS] nestJS 소켓통신 (part2. 채널마다 fetchSockets를 통한 메세지 보내주기) (0) | 2024.02.08 |
|---|---|
| [NestJS] TypeORM Tips1 (Part 1: Don't use save()) (0) | 2024.02.07 |
| [NestJS] bcrypt로 패스워드 해시화 하기 (0) | 2024.02.06 |
| [NestJS] 요즘 MZ들은 NGINX 대신 mkcert 쓴다. (1) | 2024.02.05 |
| [NestJS] NestJS 에서 Swagger을 사용해보자 (0) | 2024.02.04 |


